The weed flowering stage is where your grow starts to prove itself. After weeks of building out roots and stacking leaves, the plant begins showing you what it’s really made of. It is the moment that separates casual grows from serious ones. Everything becomes more sensitive, so every decision carries more weight.
But it’s also where the magic starts, bud sites forming, aromas kicking in, and trichomes frosting up like sugar.
I’ve seen growers panic because their buds look small in week five, or because a few fan leaves turn yellow. That’s normal. But you need to know what’s coming so you can adjust without second-guessing yourself.
Flowering doesn’t leave room for guesswork. The better your prep and awareness, the better your harvest.
This guide walks through the flowering phase step by step, explaining the timeline, visual cues, and care adjustments that help cultivators maximize yield and potency while avoiding common pitfalls.
Let’s get into it.
What Is the Flowering Stage in Cannabis?
The flowering stage is where your cannabis plant shifts from growth to production. This is when the plant stops focusing on building leaves and stems and starts forming buds, the part everyone’s been waiting for.
Flowering begins once your light cycle flips to twelve hours of darkness. That dark period is what triggers the plant to move into its reproductive mode. Outdoors, this would happen naturally as summer winds down. Indoors, it’s up to you to create that environment, and if you’re working with photoperiod clones, your plants will respond quickly and predictably.
This phase typically lasts seven to twelve weeks, depending on the strain. Indicas tend to finish faster, while sativas can take a little longer. The plant changes fast during this time. You’ll see pistils, swelling calyxes, sticky trichomes, and that signature aroma getting stronger week after week. It’s also when things can go sideways. Light leaks, humidity spikes, or overfeeding can all cause problems.
Flowering is where your genetics, environment, and technique all meet. And when those three are aligned, that’s when you grow something you’ll actually be proud of.
How To Know When Flowering Has Started
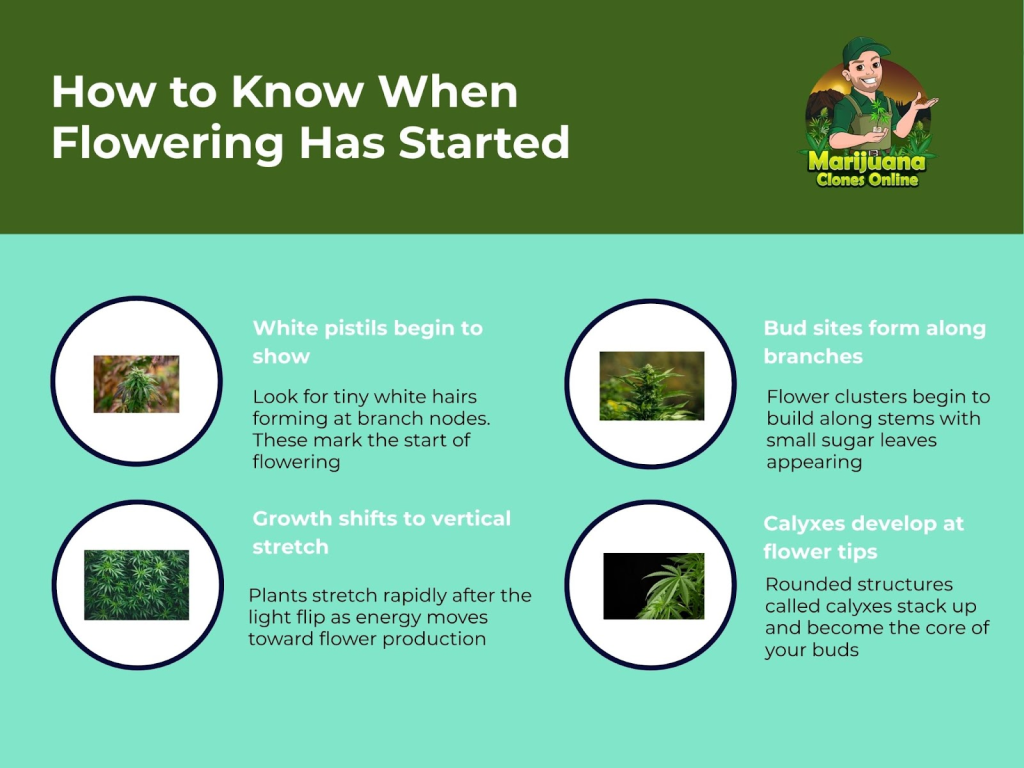
You don’t need a calendar to know when flowering begins. Your plants will show you, if you know what to look for. Here’s how I tell flowering has officially started in a healthy grow.
Look for the First Pistils
The clearest sign flowering has begun is the appearance of white hairs, or pistils, at the nodes where branches meet the main stem. These are the plant’s first attempt at reproduction. If you’re growing female clones like the ones from our facility, these pistils are the early indicators of future buds.
They usually start showing within a week of flipping to a 12/12 light cycle. Once you see them, you’re officially in pre-flower.
Notice the Growth Pattern Change
During vegetative growth, your plant stretches upward and outward with wide fan leaves. When flowering begins, that growth shifts. You’ll still see a stretch in the first couple of weeks, sometimes a big one, but you’ll also notice the plant focusing energy on forming bud sites along the tops and sides of each branch.
The leaves may appear slightly thinner, and more sugar leaves will emerge close to those developing sites.
Expect a Rapid Stretch Phase
This is a big one. After the light flip, most cannabis plants go through a major growth spurt. I’ve seen some double in size during this phase. It’s easy to misread this as continued veg, but that burst of vertical growth is part of the plant setting up its flowering structure.
Clones often stretch faster than seed-grown plants because they’re already mature. That’s one of the reasons growers who use Marijuana Clones Online cuts tend to reach harvest sooner.
Watch for Calyx Formation
Within another week or two, you’ll see calyxes forming. These are the base structures of the buds themselves. They stack on each other over time and become the core of what you harvest later.
Once those calyxes start showing alongside the pistils, you’ve moved from pre-flower into full flower. This is when feeding, lighting, and environment really start to matter.

Cannabis Flowering Timeline (Week by Week Guide)
Every strain has its own rhythm, but most follow a similar pattern through the flowering stage. This is how I track the flowering process, week by week, across every grow.
Weeks 1–2: Stretch and Pre-Flower
The plant responds to the 12-hour light cycle with a powerful vertical surge. This is known as the flowering stretch. During this phase, you’ll see rapid height gain and early signs of sex. Female plants begin showing white pistils at their nodes, and those with strong genetics will start setting the stage for serious bud development.
Key tips:
- Avoid defoliating heavily here. Let the plant direct energy upward.
- Begin easing into bloom nutrients, focusing on phosphorus and potassium.
- Monitor your light distance, as tops can burn fast during stretch.
Weeks 3–4: Budlets Begin to Form
By this stage, stretch slows and focus shifts to bud formation. You’ll notice small flower clusters stacking along the branches. Trichomes may begin appearing on sugar leaves. You’re officially into early flower.
What to focus on:
- Adjust humidity down to around 50 to 55 percent to prevent mold.
- Watch for overfeeding. Burnt leaf tips show up easily now.
- Avoid making big changes like transplanting or heavy pruning.
Weeks 5–6: Bud Swelling and Resin Production
Now you’ll start seeing what your plant is capable of. Buds become denser, pistils darken, and trichomes multiply. Aroma ramps up fast. Plants may stop stretching altogether and shift fully into weight-building mode.
Tips during this phase:
- Dial in airflow. This is when buds become vulnerable to mold and rot.
- Begin light support methods like trellis netting or soft ties.
- Reduce humidity to around 45 to 50 percent and maintain steady temperature control.
Grower tip: This is also when a lot of growers panic about small buds. Don’t. Some strains bulk up later in flower. Keep your parameters tight and stay patient.
Weeks 7–8: Ripening, Stickiness, and Color Change
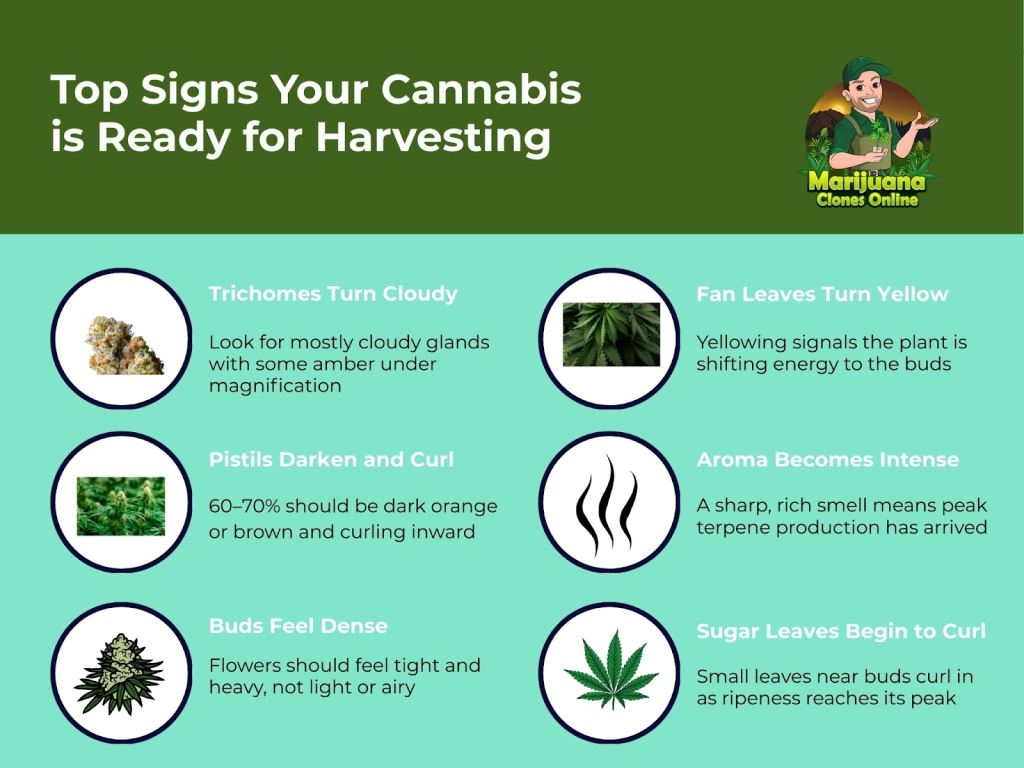
The finish line is close. Buds reach their peak size, trichomes turn cloudy, and colors may shift depending on the strain. This is when stickiness becomes a real indicator of quality. Your fingers should be covered in resin after handling buds.
Watch for:
- Pistils turning orange or brown and curling inward.
- A shift in aroma from green or grassy to complex and terpene-rich.
- Yellowing fan leaves, which signals the plant is reallocating energy.
Optional move: Begin flushing at the end of week 7 if your strain typically finishes in 8–9 weeks.
Weeks 9–10+: Final Ripening and Harvest Readiness
For strains that take longer, or growers pushing their plants for specific effects, this is the final countdown. Trichomes should be inspected closely now. Cloudy indicates peak THC, while amber signals THC breakdown into more sedative compounds.
Final steps:
- Complete flushing if you haven’t already.
- Reduce light intensity slightly to mimic fall conditions.
- Harvest when trichomes are mostly cloudy with 10 to 20 percent amber, depending on desired effect.
How to Care for Cannabis During Flowering
Cannabis plants become highly responsive during flowering. Feeding, lighting, airflow, and environmental precision all influence the final yield and quality. Each input must be adjusted with intention as the plant progresses through each week of the bloom phase.
Feed According to Flowering Needs
Nutrient demands shift early in flowering. Nitrogen must be reduced, and phosphorus and potassium should be introduced to support flower development and resin production. Overfeeding is common during this period and often presents as leaf tip burn or clawing.
By week six, nutrient strength should be gradually tapered. During the final one to two weeks, flushing with pH-balanced water supports clean combustion and aroma. Proper pH must be maintained throughout, 6.0 to 6.5 in soil, or 5.8 to 6.2 in hydro, to prevent nutrient lockout and stalled growth.
Dial in Light Conditions
Consistent light intensity supports dense bud development. Full-spectrum LED or HPS systems should be positioned for even canopy penetration while avoiding heat stress. In the final phase, red and far-red spectrum light may support additional resin development if environmental conditions are stable.
The dark cycle must remain uninterrupted. Any exposure to light during this period may result in hormonal disruption, causing flower reversion or hermaphroditism.
Control Temperature and Humidity
Flowering plants require tighter environmental parameters to avoid mold, pests, and trichome degradation. Ideal daytime temperatures remain between 68 and 78 degrees Fahrenheit. Nighttime temperatures should fall between 58 and 65 degrees without inducing stress.
Humidity must be reduced gradually throughout flowering, starting around 60 percent in early flower and reaching 40 to 45 percent by late flower. Hygrometers should be placed at canopy level and monitored daily.
Maintain Constant Airflow
Airflow prevents stagnant zones and reduces the risk of botrytis and powdery mildew. Oscillating fans must run continuously throughout the flowering cycle. Air movement should pass through the canopy without directly blasting buds. Strategic airflow across both the upper and lower canopy encourages strong gas exchange and minimizes microclimates.
Support Flowering Structure
As buds gain weight, branches begin to lean or collapse. Physical support is required to maintain vertical growth and prevent mechanical stress. Trellis netting, plant stakes, and soft support ties should be installed by mid-flower. Structural integrity ensures proper light exposure and prevents damage to colas during late-stage bulking.
Avoid Stress and Major Changes
Flowering plants do not recover easily from disruption. Transplanting, aggressive defoliation, or environmental fluctuations can reduce resin production or cause abnormal development. Pruning should be limited to early flower and applied only to improve airflow and light penetration.
Environmental controls must remain consistent throughout the flowering stage to ensure uninterrupted progression to harvest.
Common Mistakes During the Cannabis Flowering Stage
Mistakes made during flowering have long-lasting effects that can’t be reversed. Avoiding these issues preserves quality, prevents loss, and ensures that the plant reaches full maturity with proper structure and potency.
- Overfeeding Late in Flower. Continuing full-strength nutrient schedules into weeks six through eight often results in nutrient buildup and harsh-tasting flower. Feed intensity should decrease as the plant begins to ripen.
- Flipping Before Root Development Is Complete. Switching to 12/12 before a plant is properly rooted limits bud size and slows early flower development. Clones must be fully established before flowering to perform well.
- Misreading Yellowing Leaves. Yellowing in late flower is often misdiagnosed as a nutrient deficiency. In many cases, this is a natural part of senescence and should not be corrected with additional feeding.
- Interrupting the Dark Cycle. Even brief light exposure during the plant’s night period can trigger hormonal confusion, leading to hermaphroditism, foxtailing, or stalled flowering.
- Heavy Defoliation After the Stretch. Removing too many leaves in mid to late flower shocks the plant and reduces bud development. Any defoliation should be done during early stretch and limited to improving airflow.
- Harvesting Based on Pistil Color Alone. Pistils turning orange or brown is not a reliable indicator of harvest readiness. Trichome development must be examined under magnification to assess THC maturity.
- Ignoring Humidity Changes as Buds Develop. Maintaining early-vegetative humidity levels through mid or late flower increases the risk of mold and bud rot. Humidity must be lowered progressively.
- Allowing Inconsistent Temperatures. Wide swings in temperature stress the plant and may reduce terpene production or stunt trichome formation. Flowering requires a stable climate to maintain resin quality.
- Failing to Provide Structural Support. As buds bulk up, the added weight causes branches to bend or snap. Without trellis, ties, or stakes, valuable colas are often lost in late flower.
- Using High-Nitrogen Nutrients After Week 3. Nutrients designed for vegetative growth can cause leafy buds, delayed ripening, and reduced trichome density if used deep into flowering.
So, Master the Flowering Phase
The flowering stage is where results are earned. Every decision, from the light schedule to the final flush, affects how each bud matures and expresses its potential. Once a plant begins flowering, it demands precision.
Success during this stage is not defined by guesswork. It comes from managing light cycles without interruption, maintaining tight environmental control, feeding appropriately based on development stage, and recognizing that what appears to be a problem may often be part of the natural ripening process.
Common concerns like small buds, leaf yellowing, or delayed aroma typically have a solution rooted in environment, genetics, or timing, not panic-driven corrections.
Ready to Crush Your Next Grow?
Get a head start with pest-free, phenohunted cannabis clones from Marijuana Clones Online. These are the same genetics top breeders use.