You can grow weed from seeds at home with the right setup. Start by germinating seeds in a warm, moist environment. Then, plant seedlings in quality soil or coco under 18 hours of light daily. With proper care, expect harvest-ready buds in 3–8 months.
Still not sure what to do next? Ask yourself:
- Are you about to waste your seeds before they even sprout?
- What’s the one rookie mistake that kills most seedlings?
- Is your lighting setup helping your plants, or frying them?
- How deep should you plant a germinated seed to avoid failure?
If you’re not 100% sure, don’t worry.
This guide walks you through every step with beginner-friendly instructions, pro grower insights, and crucial tips most tutorials skip.
Step-by-Step Guide to Growing Weed from Seeds
Let’s explore the process step by step, so you can avoid beginner mistakes and give your plants the strongest start possible.
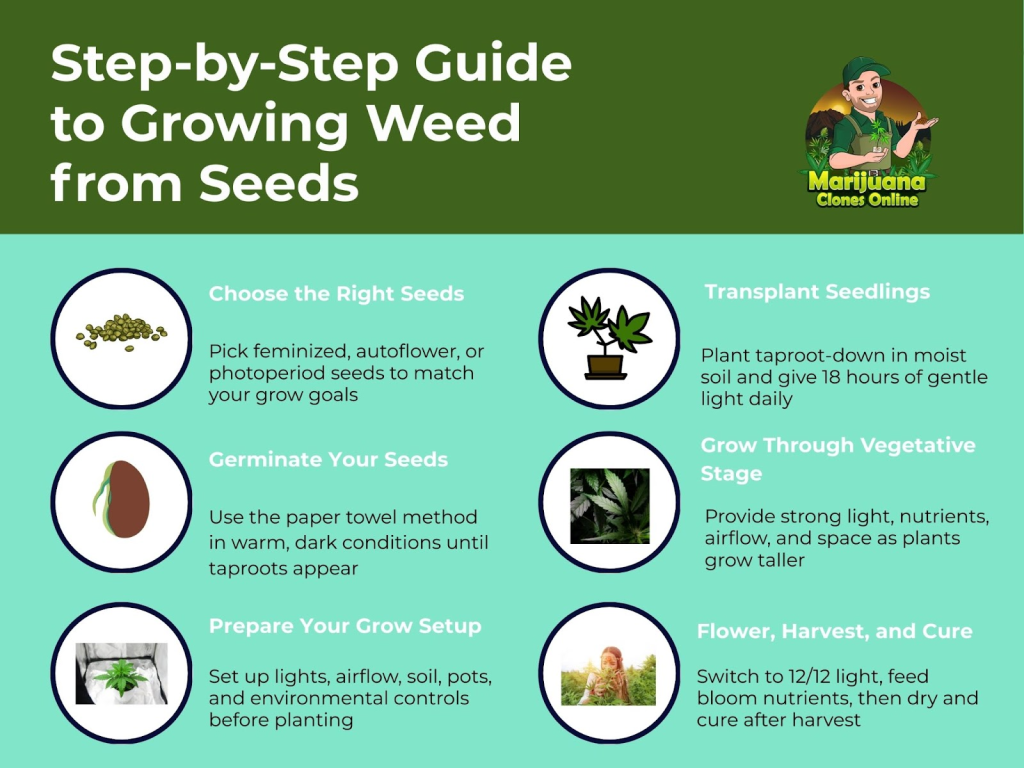
Step 1: Choosing the Right Cannabis Seeds
Start by selecting seeds that align with your growing environment and goals. There are three primary types of cannabis seeds:
- Feminized Seeds. These are bred to produce only female plants, which are the ones that yield buds. Feminized seeds reduce the risk of growing a male plant, which can pollinate females and ruin your entire crop.
- Autoflower Seeds. These switch from vegetative growth to flowering based on age instead of light cycle. They are well-suited for small spaces or limited timeframes.
- Photoperiod Seeds. These require specific light schedules to initiate flowering. Although they take longer, they often produce larger yields and allow for more control over plant size and structure.
Step 2: Germinating Cannabis Seeds
Germination is the process that wakes the seed and signals it to begin growing. A healthy start during this stage sets the tone for the rest of the grow. While there are multiple methods available, some techniques provide more control and higher success rates for beginners.
The most reliable method involves using moist paper towels.
- Start by soaking two paper towels in distilled or reverse osmosis water.
- Wring them out until they are damp but not dripping.
- Place the cannabis seeds between the two towels and set them inside a plastic container or ziplock bag.
This setup should then be stored in a dark, warm place that maintains a temperature between 70 and 85 degrees Fahrenheit. Many growers use a kitchen cabinet or the top of a refrigerator to achieve this stable warmth.
After one to four days, the seeds should begin to crack open and reveal a white taproot. This is the beginning of the root system, and it is extremely fragile. Avoid handling the root with bare hands, as even slight damage can stop growth entirely.
Use sterilized tweezers to transfer the sprouted seed into your chosen medium during the transplanting stage.
Some growers attempt to plant seeds directly in soil or skip steps to speed up the process, but this often leads to failure. Using the paper towel method increases visibility and ensures only viable seeds move forward in the grow.
Step 3: Preparing Your Grow Setup
Before planting, set up a space where your seedlings can grow safely and consistently. Use this checklist to get everything ready:
- Choose your grow space. A small tent, closet, or cabinet with airflow and privacy works well.
- Set up lighting. Use full-spectrum LED grow lights set to an 18-hour daily light cycle. Keep lights 18 to 24 inches above the plants.
- Control the environment. Keep temperatures between 72 and 78°F and humidity near 70 percent. Use a thermometer and hygrometer to track conditions.
- Pick your growing medium. Use light, well-draining soil or coco coir. Avoid dense or reused soil that may contain pests.
- Prepare your containers. Use small pots or solo cups with drainage holes. Lightly moisten the medium before transplanting.
Step 4: Transplanting Your Seedlings
Begin by filling small pots or solo cups with your chosen growing medium. Make sure the soil is lightly moistened but not soaked. Use a pencil or your finger to create a hole about one inch deep in the center of the medium. This will be the space where the seedling sits.
Gently lift the sprouted seed using tweezers, taking care not to touch the taproot. Place the seed taproot-down into the hole, then cover it loosely with soil. Press the surface gently to secure the seedling without compacting the soil too tightly.
Immediately after transplanting, place the container under your grow light. Keep the light positioned 18 to 24 inches above the top of the soil. Set the schedule to 18 hours of light and 6 hours of darkness each day. This lighting pattern supports strong early growth.
Step 5: Nurture Your Seedlings for Healthy Growth
The seedling stage sets the foundation for your entire grow. During this time, plants are fragile and highly responsive to their environment. Consistency is key to helping them develop strong roots, sturdy stems, and healthy leaves.
Seedlings require 18 hours of gentle light each day. Use full-spectrum LEDs and keep them 18 to 24 inches above the canopy. If the seedlings stretch too much and lean, the light is either too far or too weak. Adjust the height or intensity to keep them compact and upright.
Maintain a temperature range between 72 and 78°F, with humidity between 65 and 70 percent. This encourages steady development while preventing issues like mold or slowed growth. Use a hygrometer and thermometer to track conditions, and place a small fan nearby to improve airflow. Gentle movement helps strengthen the stems and prevents stale air from settling around the leaves.
Water carefully during this phase. Check the top inch of soil with your finger. If it feels dry, give a small amount of water around the base of the plant. Avoid soaking the soil or letting water pool at the bottom of the container. Overwatering is a common mistake that leads to root rot or damping off.
Step 6: Transition to Vegetative Growth
After two to three weeks in the seedling stage, your plants will be ready to enter vegetative growth. This is when they begin to focus on building size, strength, and structure. Proper care during this stage sets the foundation for higher yields later.
The vegetative stage requires consistent light. Keep your grow lights on an 18-hour cycle, positioned close enough to prevent stretching but far enough to avoid leaf burn. Plants at this point respond well to more intense light, so gradually adjust height or output as they grow taller and develop more nodes.
Nutrients become more important in this stage. Start feeding with a balanced fertilizer at low strength, then increase as the plant matures. Look for nutrients higher in nitrogen, as this supports leaf and stem growth. Always check pH levels before watering or feeding to ensure nutrients can be absorbed effectively.
- Re-potting may be necessary once roots begin to fill the current container. Move plants into larger pots carefully, keeping soil around the root ball intact to avoid stress. Each transplant gives the roots space to expand and helps the plant continue its rapid growth.
- Airflow and spacing are also critical. As plants get larger, make sure they are not crowding one another. Good spacing allows light to reach all leaves and prevents excess humidity from building up between plants. A small oscillating fan strengthens stems and reduces the risk of mold or pests.
- Throughout the vegetative stage, monitor your plants daily. A healthy plant will show vibrant green leaves, steady vertical growth, and new nodes forming regularly. If you notice yellowing leaves, drooping, or stalled growth, adjust watering, nutrients, or environmental conditions quickly to keep development on track.
Step 7: Trigger Flowering (Photoperiod Strains Only)
The flowering stage begins once you change the light cycle to 12 hours on and 12 hours off. This shift signals your plants to stop focusing on leafy growth and start producing buds. Use a timer to keep the schedule exact, since inconsistent lighting can stress plants and slow development.
During the first two weeks of flowering, many plants experience a rapid stretch. They can double in size during this time, so adjust your lights as needed to prevent burning. Keep the canopy evenly lit and ensure there is enough space between plants for airflow.
As buds start forming:
- Lower humidity to about 40 to 50 percent and keep temperatures between 68 and 77°F. This helps protect flowers from mold while keeping growth steady.
- Switch to bloom nutrients that are higher in phosphorus and potassium to support bud development.
- Check plants carefully for sex at this stage. Female plants show white pistils at the nodes, while males develop small pollen sacs. Remove any males right away to prevent pollination, which reduces flower quality and yield.
Once confirmed female, your plants will continue producing more pistils and begin stacking buds.
Step 8: Flowering to Harvest
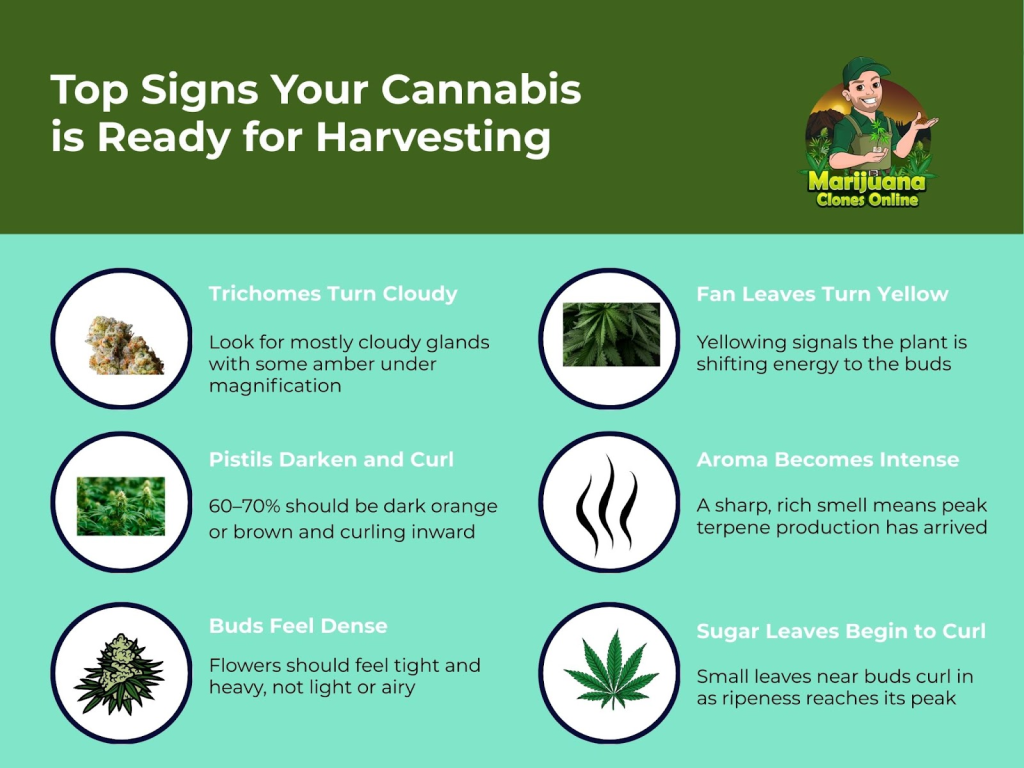
Once flowering is underway, the plant’s energy shifts toward developing buds. During this stage, patience and attention to detail will determine the final quality of your harvest. Buds begin as small clusters of white pistils and gradually swell into dense flowers coated with trichomes. Providing a stable environment throughout this stage is essential for maximum yield.
Keep your light schedule locked at 12 hours on and 12 hours off. Any interruption in the dark period can stress the plant and lead to hermaphroditism. Maintain humidity around 40 to 50 percent and temperatures between 68 and 77°F. Gentle airflow across the canopy reduces the risk of mold as flowers become heavier and more compact.
Feeding during this period should focus on bloom nutrients rich in phosphorus and potassium. These elements support resin production, bud density, and overall potency. Reduce nitrogen levels, as too much will keep the plant focused on leaves rather than flowers. Continue monitoring pH to ensure nutrients are absorbed properly.
As harvest approaches, watch the trichomes closely. Under a magnifying glass or jeweler’s loupe, clear trichomes signal that the plant is still immature. Milky trichomes indicate peak potency, while amber ones produce a heavier, more sedative effect. Harvesting when trichomes are mostly milky with some amber offers a balanced result.
Step 9: Drying & Curing Your Buds
After harvest, drying and curing are critical steps that determine the final taste, smoothness, and potency of your cannabis. Rushing this process often leads to harsh smoke and weaker aroma, so patience here pays off.
- Begin by trimming large fan leaves from your harvested plants.
- Hang whole branches or individual buds upside down in a dark room with good airflow.
- Maintain a temperature of about 60 to 70°F and humidity between 55 and 60 percent.
Drying usually takes 7 to 14 days. Buds are ready for the next step when small stems snap instead of bend.
Once dry, place the buds into airtight glass jars for curing. Fill jars about three-quarters full to allow airflow, then store them in a cool, dark place. Open the jars once or twice a day for the first week to release moisture and bring in fresh air. This process, called “burping,” prevents mold and helps even out moisture levels inside the buds.
Curing should continue for at least two to four weeks, although many growers cure for several months for maximum flavor and smoothness. Properly dried and cured cannabis not only tastes better but also burns cleaner and delivers a stronger, longer-lasting effect.
Seeds vs. Clones: Which Is Right for You?
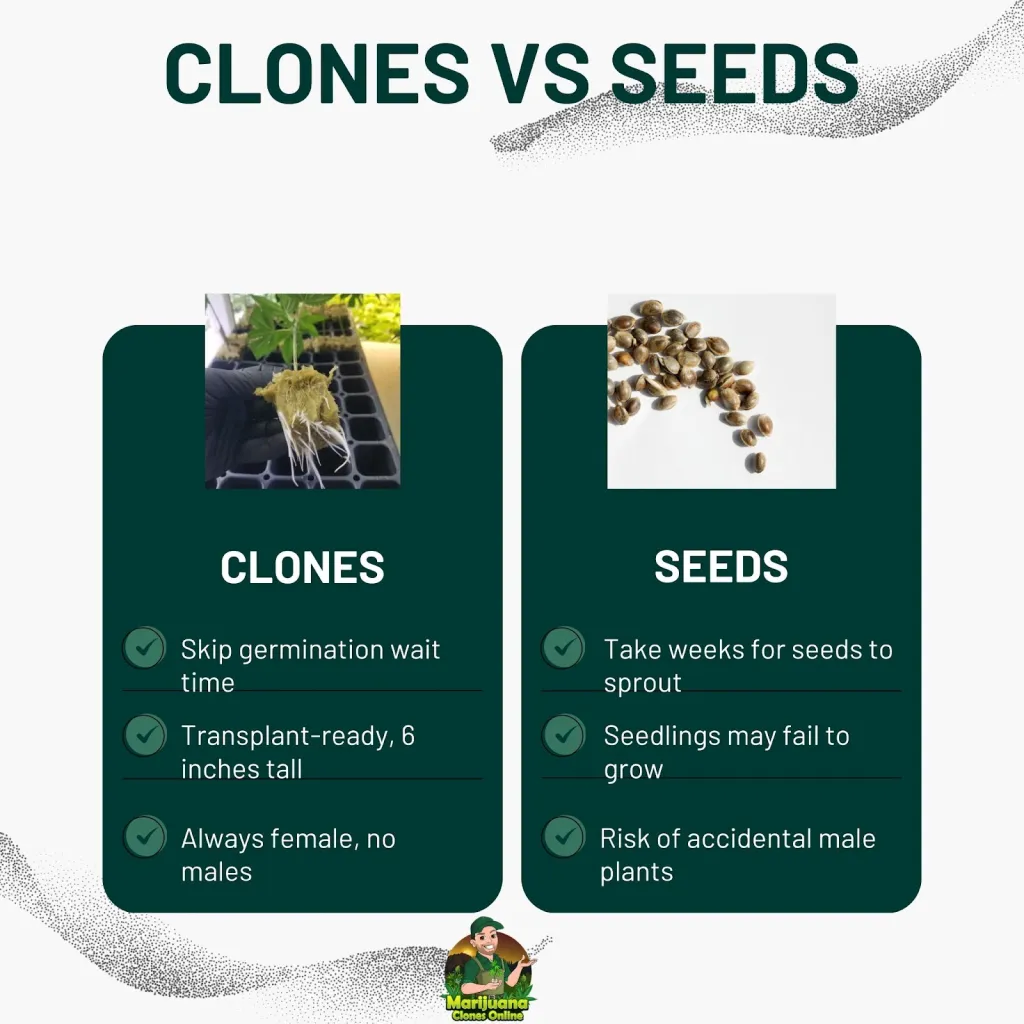
Seeds are accessible and provide the opportunity to grow a wide range of genetics. Feminized seeds are designed to produce female plants, while autoflower seeds move into flowering based on age instead of light cycle.
Clones are cuttings taken from a proven mother plant. They are genetic replicas, meaning every clone will produce the same quality, potency, and structure as the parent. They save four to six weeks compared to seeds and guarantee female genetics.
Clones do require careful sourcing, since unhealthy stock can spread pests or disease, and availability is often limited to certain strains.

Which Should You Choose?
Seeds are best for growers who want variety, experimentation, and the satisfaction of nurturing a plant from its earliest stage. Clones are ideal for those who want speed, consistency, and reliability.
Ready to skip the seed stress? Try Marijuana Clones Online’s sterile, phenohunted cannabis clones and get 30+ days of growth, delivered to your door.